Make A Multi-Step Online Application Form with progress bar Using jQuery
By Bytewebster - September 17, 2022
Welcome to the bytewebster Project blogs.
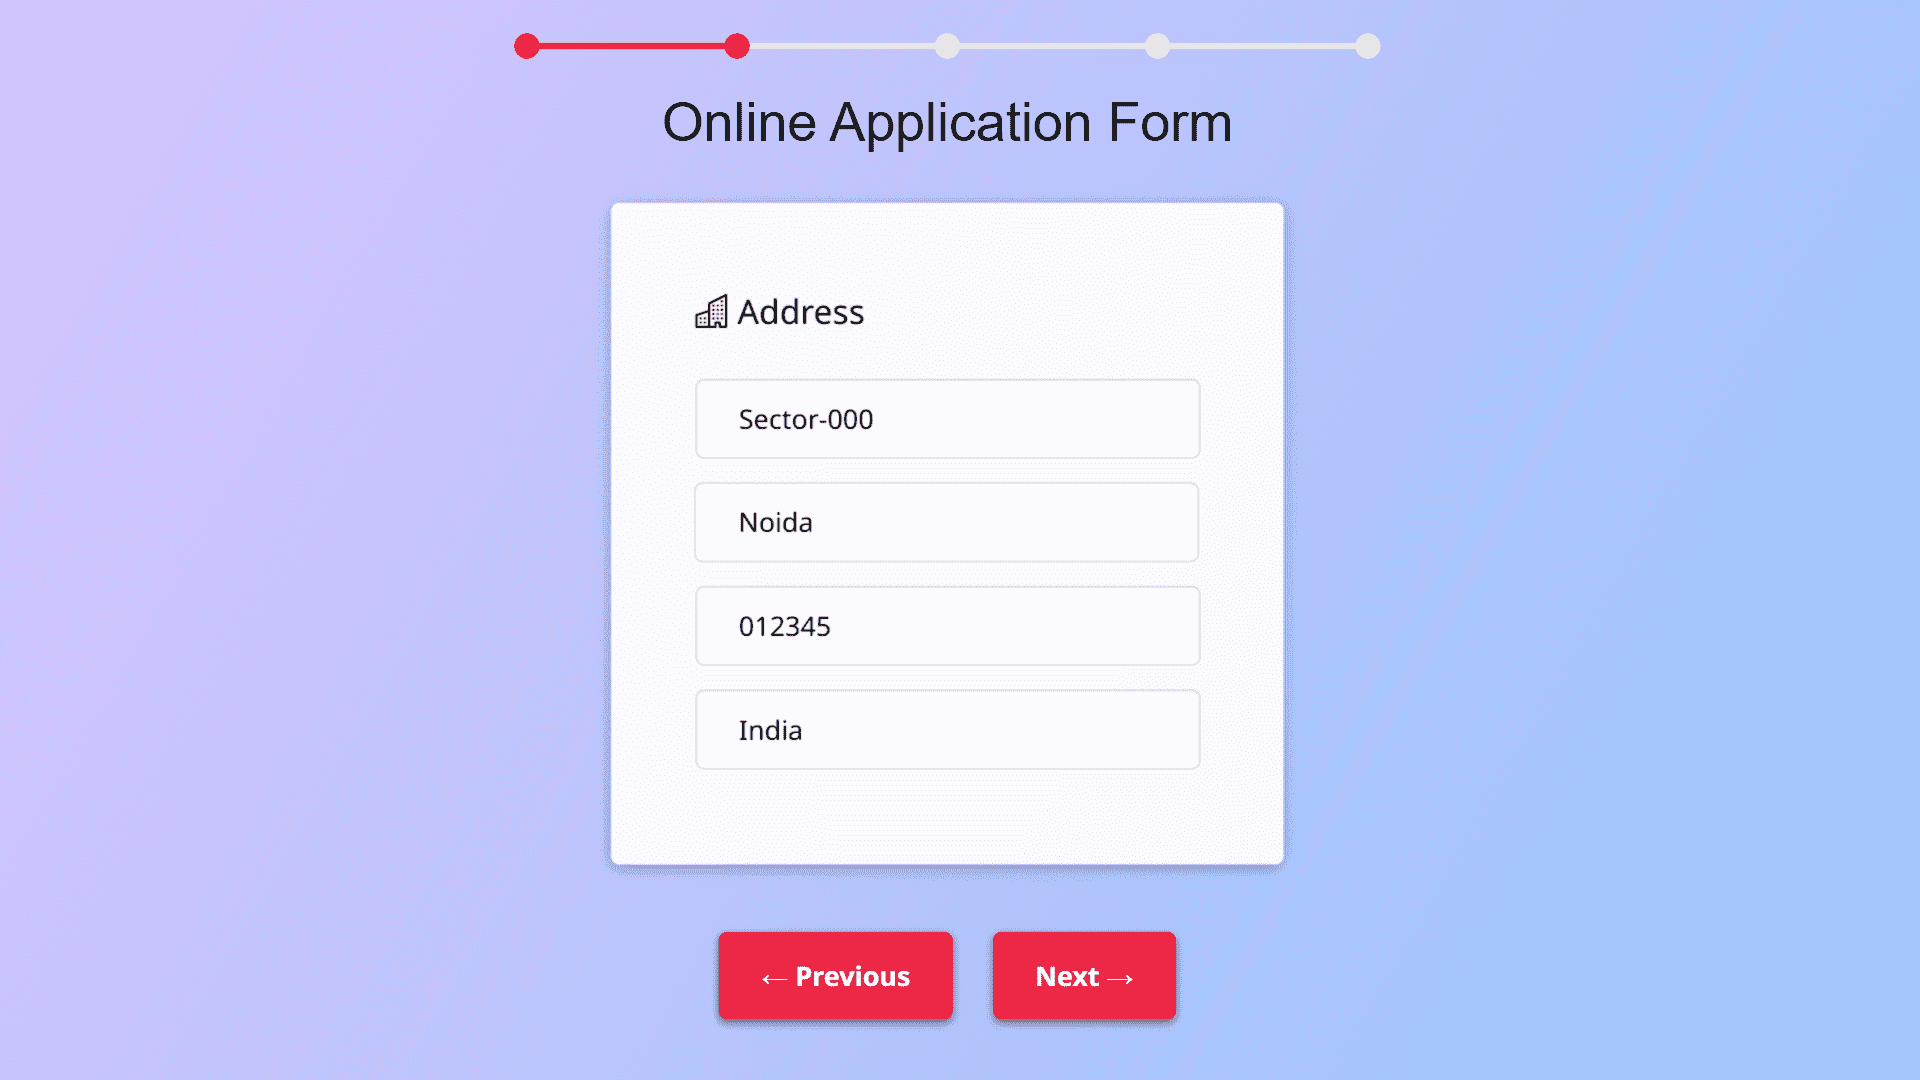
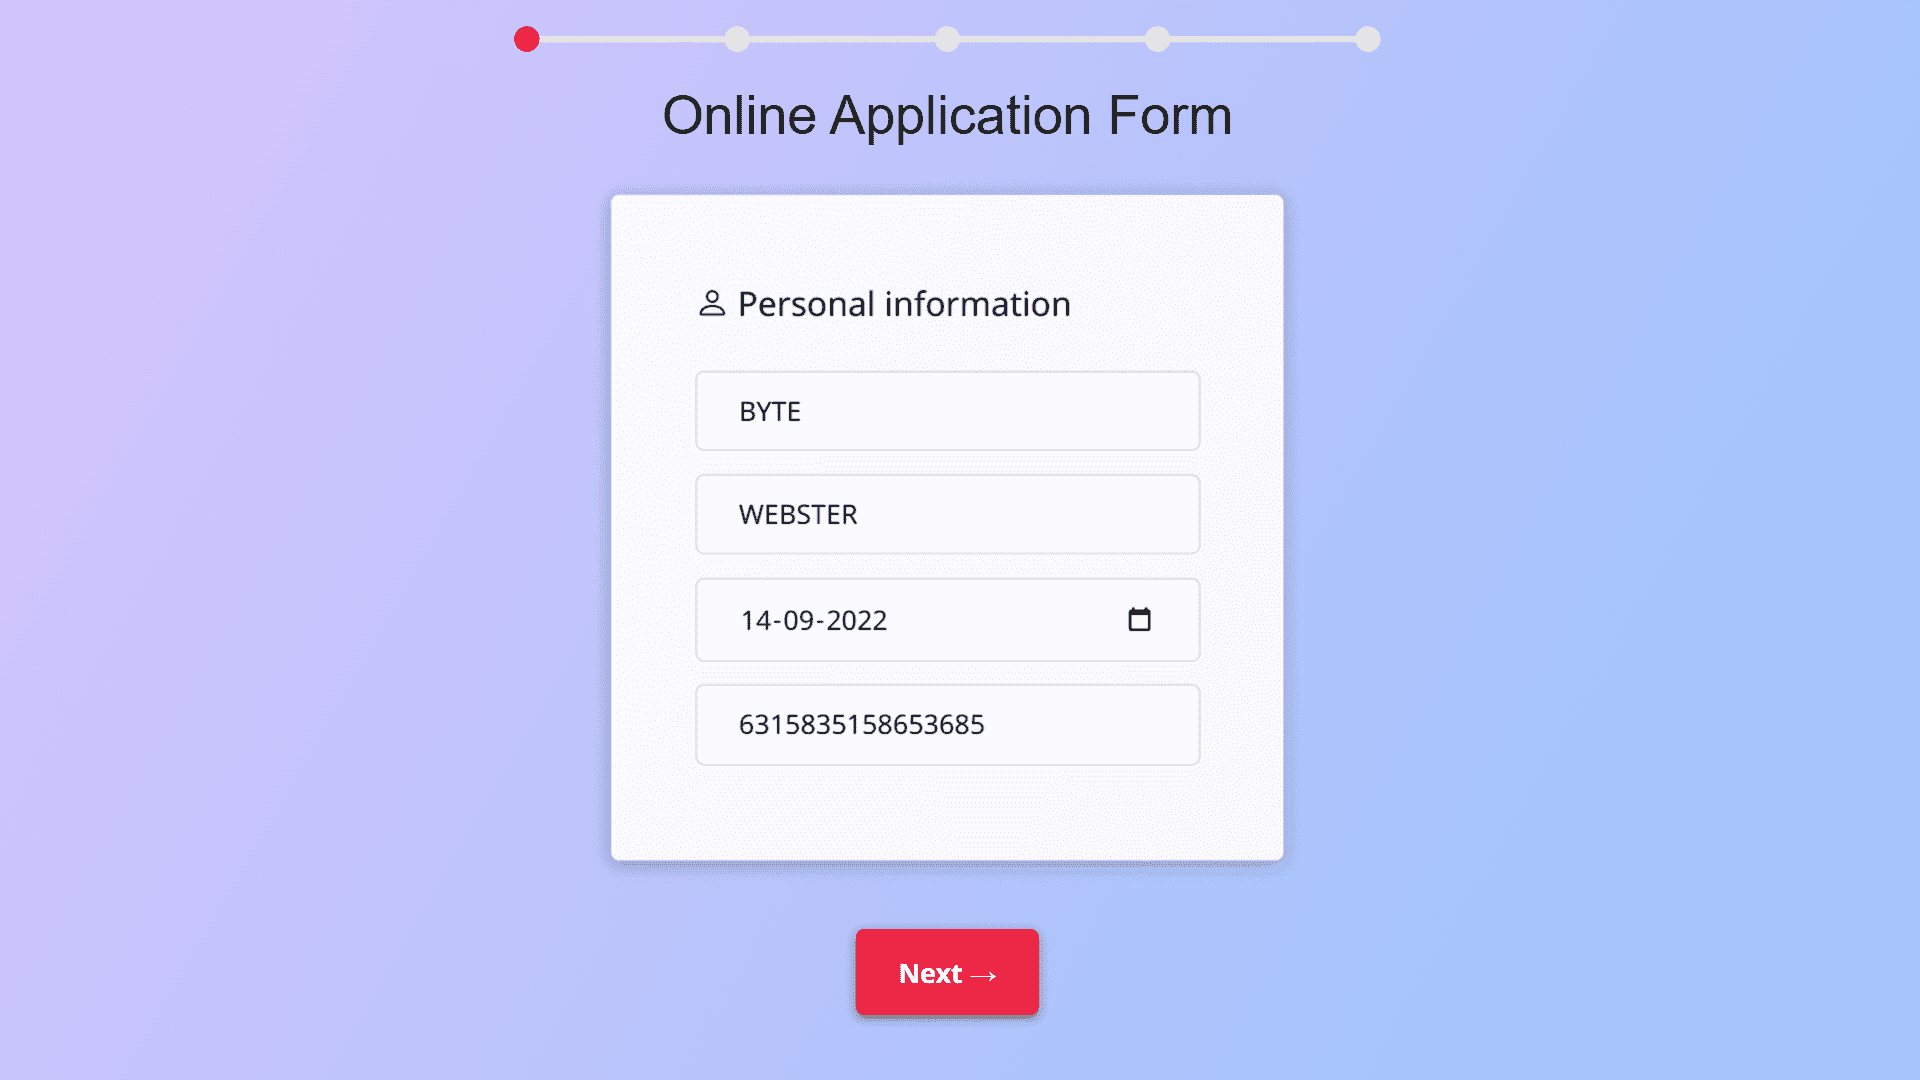
In this, we will create a multi-step online application form using jQuery. We used jQuery because it improves the user experience of any website.
And one of its special things is that it takes the form to the next step without refreshing the page.
Working:
There are 4 steps in this application form and there are about 3 to 4 input fields inside each step. After filling up the given inputs under all the steps, you will reach the step with Terms of Services where you will get the option of agreeing and sending an application If there is a mistake in filling in any input and you go to the next step, then you can go back to the previous step with the help of the previous button.
Detailed Overview of Project
If you want to make this project by yourself without downloading the source code files. So then you have to create three files first First file will be of HTML, second file CSS and the last file will be of JavaScript and then you have to take those files to your text editor where you will create this project.
If you are learning Web development then you will already know this again, we say this for a few newbies.
HTML Structure
Its HTML part is basic, there is nothing much in it. we will start making this with its progress bar, for which we have used SVG. then we have to create separate sections for the details of the form.
Now the name of that step will be written inside each section tag, we have used a paragraph tag for this, if you want, you can also write it inside the heading tag.
Now after this we will create input tags inside each section according to the requirements of our form.
Now the last part is left in which we have to make previous and next buttons below the form. For these buttons, we have made the div tag which we have given IDs according to their work.
<div id="svg_wrap"></div>
<h1>Online Application Form</h1>
<section>
<p><i class="bi bi-person"></i> Personal information</p>
<input type="text" placeholder="Firstname" />
<input type="text" placeholder="Surname" />
<input type="text" placeholder="Birthdate" />
<input type="text" placeholder="Insurance number" />
<input type="text" placeholder="Family status" />
</section>
<section>
<p><i class="bi bi-building"></i> Address</p>
<input type="text" placeholder="Street, nbr" />
<input type="text" placeholder="City" />
<input type="text" placeholder="Postcode" />
<input type="text" placeholder="Country" />
</section>
<section>
<p><i class="bi bi-telephone"></i> Contact information</p>
<input type="text" placeholder="Email address" />
<input type="text" placeholder="Phone" />
<input type="text" placeholder="Mobile" />
</section>
<section>
<p><i class="bi bi-file-text"></i> Application</p>
<input type="text" placeholder="Preferred entrance date" />
<input type="text" placeholder="Number of people" />
</section>
<section>
<p>Terms and Conditions</p>
<p>Lorem ipsum dolor, sit amet consectetur adipisicing elit. Libero ullam optio quis voluptas ipsam illum beatae nisi autem blanditiis possimus quidem, qui accusantium necessitatibus provident earum nihil, saepe animi, similique vero, inventore corrupti. A aperiam consequuntur nemo dignissimos ipsa totam excepturi, distinctio debitis earum alias reprehenderit officia corrupti est ipsum cupiditate aut voluptates unde eaque nostrum amet!</p>
</section>
<div class="button" id="prev">← Previous</div>
<div class="button" id="next">Next →</div>
<div class="button" id="submit">Agree and send application</div> Styling With CSS
This form is just a structure, now it's time to style it with the help of CSS, This is very easy to do because in this we have to style only the main parts of it, that too in a basic way.
First, we styled the HTML and the body tag. Inside the body tag, we styled the background with the colors of the linear gradient
After this, We placed the section of the form in the center of the web page then we did all the styling by giving the same class to all the sections and the input tags.
Then there are the Previous and Next buttons that we styled using basic CSS. like We have used Inline-block and margin, padding property
@import url('https://fonts.googleapis.com/css2?family=Noto+Sans:ital,wght@0,400;0,700;1,400;1,700&family=Roboto+Slab:wght@400;700&display=swap');

html {
  height: 100%;
  min-height:800px;
}
body {
  background-image: linear-gradient(120deg, #e0c3fc 0%, #8ec5fc 100%);
  background-size:cover;
  background-repeat:no-repeat;
  text-align: center;
 font-family: 'Noto Sans', sans-serif;
  -webkit-touch-callout: none;
  -webkit-user-select: none;
  -khtml-user-select: none;
  -moz-user-select: none;
  -ms-user-select: none;
  user-select: none;
}

h1{
  font-weight:400;
  padding-top:0;
  margin-top:0;
  font-family: arial;
}

#svg_form_time {
  height: 15px;
  max-width: 80%;
  margin: 40px auto 20px;
  display: block;
}

#svg_form_time circle,
#svg_form_time rect {
  fill: white;
}

.button {
  background: rgb(237, 40, 70);
  border-radius: 5px;
  padding: 15px 25px;
  display: inline-block;
  margin: 10px;
  font-weight: bold;
  color: white;
  cursor: pointer;
  box-shadow:0px 2px 5px rgb(0,0,0,0.5);
}

.disabled {
  display:none;
}

section {
  padding: 50px ;
  max-width: 300px;
  margin: 30px auto;
  background:white;
  background:rgba(255,255,255,0.9);
  backdrop-filter:blur(10px);
  box-shadow:0px 2px 10px rgba(0,0,0,0.3);
  border-radius:5px;
  transition:transform 0.2s ease-in-out;
}


input {
  width: 100%;
  margin: 7px 0px;
  display: inline-block;
  padding: 12px 25px;
  box-sizing: border-box;
  border-radius: 5px;
  border: 1px solid lightgrey;
  font-size: 1em;
  font-family:inherit;
  background:white;
}

p{
  text-align:justify;
margin-top:0;
font-size: 18px;
}
JavaScript Explanation
Let us now move on to the most important part of it which is javascript. As we have already mentioned above that we will use jQuery here for this
It is necessary to have the CDN links of jQuery, which you can obtain either by visiting their official website or by simply copying and pasting the links below.
<script type="text/javascript" src="https://cdnjs.cloudflare.com/ajax/libs/jquery/3.4.1/jquery.min.js"></script>
<script type="text/javascript" src="js/script.js"></script>
This code starts by declaring a variable named base_color. This is the color of the background of all sections in the document. then we declares another variable, active_color, which will be used to set the color for section 1.
The first line hides all sections except for section 1 and sets its class to disabled so that it can't be clicked on or hovered over. and next line uses jQuery's .not() method to hide all sections except for section 1 and sets its class to disabled as well.
We will hide all the sections except for the first one. it will disable the submit button on every other section of the page, so that it is not possible to click on it and navigate away from this particular section.
By setting the width of the SVG to be 24 pixels wide and then it sets a viewBox attribute with an x value of 0px and y value of 0px The next line is where the code starts to draw the image, which will be drawn on top of all other images in this section.
The first thing that happens is that we set up a variable called svgWidth, which represents how long our image should be. Then we calculate how many pixels wide our image should be based on its length (the number of lines) multiplied by 200 (the default font size).
Next, we create an HTML string with some text inside it so that when someone looks at this page they can see what's going on.
$( document ).ready(function() {
var base_color = "rgb(230,230,230)";
var active_color = "rgb(237, 40, 70)";


var child = 1;
var length = $("section").length - 1;
$("#prev").addClass("disabled");
$("#submit").addClass("disabled");

$("section").not("section:nth-of-type(1)").hide();
$("section").not("section:nth-of-type(1)").css('transform','translateX(100px)');

var svgWidth = length * 200 + 24;
$("#svg_wrap").html(
  '<svg version="1.1" id="svg_form_time" xmlns="http://www.w3.org/2000/svg" xmlns:xlink="http://www.w3.org/1999/xlink" x="0px" y="0px" viewBox="0 0 ' +
    svgWidth +
    ' 24" xml:space="preserve"></svg>'
);

function makeSVG(tag, attrs) {
  var el = document.createElementNS("http://www.w3.org/2000/svg", tag);
  for (var k in attrs) el.setAttribute(k, attrs[k]);
  return el;
}

for (i = 0; i < length; i++) {
  var positionX = 12 + i * 200;
  var rect = makeSVG("rect", { x: positionX, y: 9, width: 200, height: 6 });
  document.getElementById("svg_form_time").appendChild(rect);
  // <g><rect x="12" y="9" width="200" height="6"></rect></g>'
  var circle = makeSVG("circle", {
    cx: positionX,
    cy: 12,
    r: 12,
    width: positionX,
    height: 6
  });
  document.getElementById("svg_form_time").appendChild(circle);
}

var circle = makeSVG("circle", {
  cx: positionX + 200,
  cy: 12,
  r: 12,
  width: positionX,
  height: 6
});
document.getElementById("svg_form_time").appendChild(circle);

$('#svg_form_time rect').css('fill',base_color);
$('#svg_form_time circle').css('fill',base_color);
$("circle:nth-of-type(1)").css("fill", active_color);


$(".button").click(function () {
  $("#svg_form_time rect").css("fill", active_color);
  $("#svg_form_time circle").css("fill", active_color);
  var id = $(this).attr("id");
  if (id == "next") {
    $("#prev").removeClass("disabled");
    if (child >= length) {
      $(this).addClass("disabled");
      $('#submit').removeClass("disabled");
    }
    if (child <= length) {
      child++;
    }
  } else if (id == "prev") {
    $("#next").removeClass("disabled");
    $('#submit').addClass("disabled");
    if (child <= 2) {
      $(this).addClass("disabled");
    }
    if (child > 1) {
      child--;
    }
  }
  var circle_child = child + 1;
  $("#svg_form_time rect:nth-of-type(n + " + child + ")").css(
    "fill",
    base_color
  );
  $("#svg_form_time circle:nth-of-type(n + " + circle_child + ")").css(
    "fill",
    base_color
  );
  var currentSection = $("section:nth-of-type(" + child + ")");
  currentSection.fadeIn();
  currentSection.css('transform','translateX(0)');
 currentSection.prevAll('section').css('transform','translateX(-100px)');
  currentSection.nextAll('section').css('transform','translateX(100px)');
  $('section').not(currentSection).hide();
});

});
Thank you for taking the time to read this article, and we hope you enjoyed it.
Video of the Project
Take This Short Survey!
Download Source Code Files
From here You can download the source code files of this jQuery Multi-Step Online Application Form
If you are just starting out in web development, this snippets will be useful. We would appreciate it if you would share our blog posts with other like-minded people.
ByteWebster Play and Win Offer.

PLAY A SIMPLE GAME AND WIN PREMIUM WEB DESIGNS WORTH UPTO $100 FOR FREE.
PLAY FOR FREE
